Photoshops New AI Assist, a closer look

Photoshop has just introduced AI Assist, a new guided helper designed to make everyday image editing clearer, faster and far less intimidating for users of all abilities. If your team often dips in and out of Photoshop, or if you work with mixed skill levels across marketing, fundraising or photography, this update is a genuinely helpful one.

Meet two workspaces: easy AI Assisted and Photoshop Pro

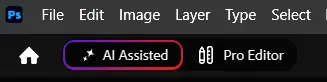
AI Assisted and Pro Editor on the Control Bar in PhotoshopOnce Photoshop has updated to the AI version using the assistant is straightforward. You can either access it directly from the splash screen when loading Photoshop or directly in the software in the top left of the control bar. Instead of one Photoshop space you now have two.

Access Assitant directly from the opening splash screen by clicking on the AI Assisted Editor from the menu on the left or from directly inside Photoshop.

Inside Photoshop look to the very top left of the Control Bar and you’ll see two new icons.

  • Pro Editor: This is the classic Photoshop layout. It has all the advanced buttons, menus, and tools. Use this when you want total, manual control over every tiny detail of your photo.
  • AI Assisted Editor: This is a newer, simplified layout. Instead of hunting through complicated menus, you just type what you want to change using normal text descriptions. Use this for quick fixes or experimenting with fast, automatic ideas


Funnily enough the new bar works on a vaguely similar principle as Affinity Studio in that you can jump between workspaces.

Once AI Assisted space is clicked the screen below opens.
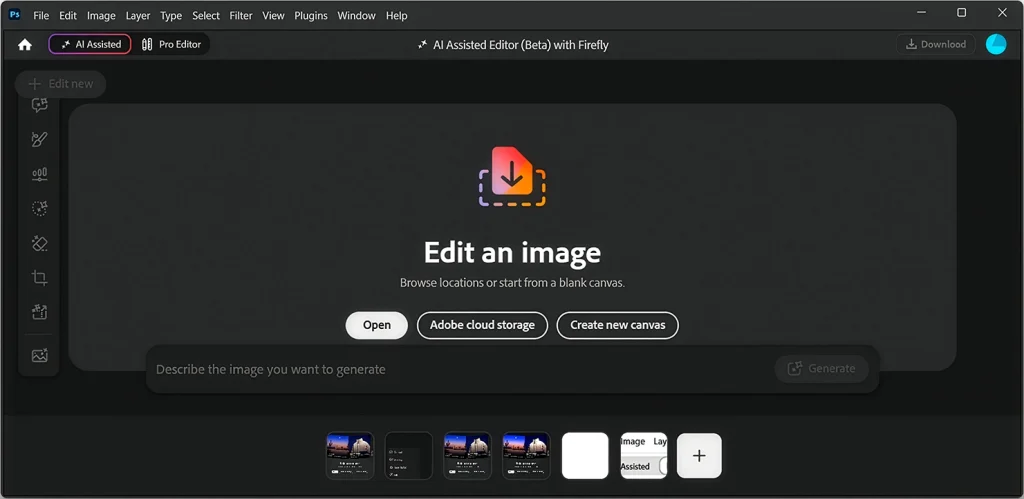
AI Assisted Space

The AI Assisted Space

Your New AI Toolkit: everything under one umbrella

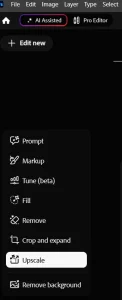
One way to think of this new space is as a visual database of AI tools. Instead of forcing you to hunt through different panels, Adobe has gathered all your essential AI tools together in one convenient place, including:

  • Prompt to Edit & AI Markup
  • Remove Background & Remove Tool
  • Generative Fill & Generative Expand
  • Generative Upscale

Instead of wasting time manually clicking through multiple menus, Prompt to Edit lets you describe the exact changes you want in plain English.
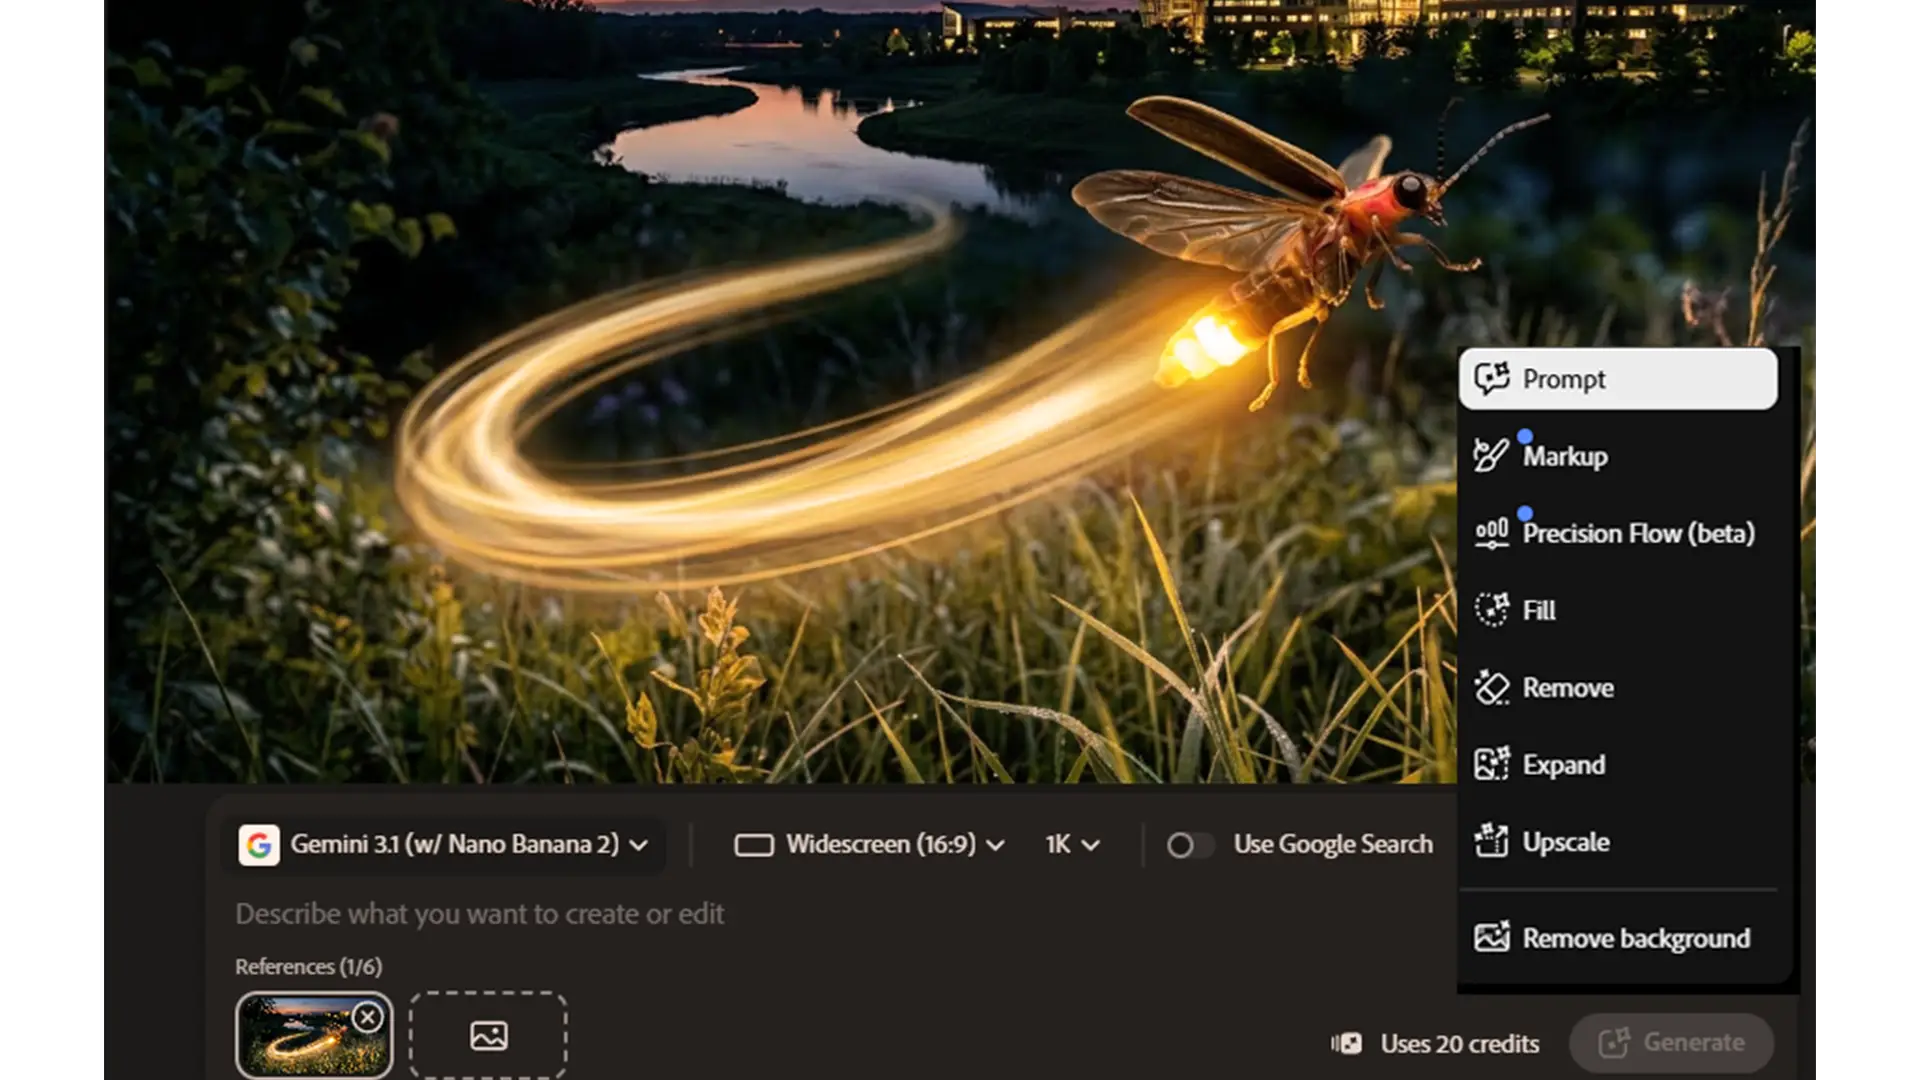
If you’ve ever been on one of my Photoshop courses, you know how much I emphasise keeping your workflow non-destructive. The brilliant thing about this AI update is that Adobe didn’t throw that golden rule away! By automatically placing your AI edits on a dedicated generative layer, the software protects your original pixels. It acts just like a traditional layer mask or smart object giving you total creative freedom to tweak, hide, or erase the AI adjustments without ever damaging your original photo.
 
If you prefer a more visual approach, the AI Markup tool is a game-changer. You simply draw or circle directly over an area on your image to point out exactly what needs a change whether you want to recolour an object or expand a background. You then type a quick instruction, and the AI handles the rest. It is a fantastic, intuitive way to blend sketching with everyday language.

Word to Art: teaching your Adobe Assistant to speak human

By training the software to understand regular human speech, Adobe Assistant acts as a bridge between your creative ideas and complex technical tools. Adobe AI Assistant completely changes how we design by letting you talk to your creative software like a human helper. Instead of wasting time digging through confusing menus and clicking dozens of buttons, you simply type what you want in plain English.

For example, in Photoshop, you can just type, “remove the crowd in the background and change the sky to a sunset,” and the AI edits the image for you instantly. Similarly, in Illustrator, you can say, “organise these graphics onto separate pages for printing,” and it handles the tedious cleanup work in seconds. It essentially takes care of the technical headaches so you can focus on the fun, creative side of your project

Prompt to Edit

The Prompt to Edit feature lets you describe what changes you need. Instead of searching for the right tool or panel, you can simply type a short instruction and Photoshop guides you through the steps or applies the adjustment directly.

It’s designed for quick, everyday fixes: brightening an image, softening a background, improving colour, sharpening details or adjusting contrast. For beginners, it removes the guesswork. For experienced users, it speeds up repetitive tasks and keeps the workflow moving without breaking concentration.

Prompt to Edit is especially useful for teams who dip in and out of Photoshop and need a fast, friendly way to make improvements without remembering every tool or slider.

  • Brighten the photo slightly ideal for dull or underexposed images.
  • Soften the background  helpful for portraits or product shots where you want more focus on the subject.
  • Warm up the colours great for outdoor images or photos that feel a bit cool or flat.
  • Sharpen the details useful for soft images, especially event or charity photos taken on the move.
  • Reduce the noise perfect for low‑light or high‑ISO shots.
  • Fix white balance helpful when images look too blue or too orange.
  • Improve the contrast a quick way to add depth without diving into multiple panels.


These prompts work because they describe the intent rather than the tool and AI Assist handles the rest.

Deepen the knowledge: the future of AI

Interested in where this is technology is actually going? Read Adobe’s official vision for Agentic AI and conversational assistants and how they are building next-generation Creative agents that understand artistic intent.
 
You can also learn about Adobes strict privacy commitments directly on the Adobe Acrobat AI Assistant Page, which guarantees your personal data is never used for AI training

Try it for yourself - an everyday Adobe AI prompt sheet

You don’t need to learn a new technical language to get great results from Adobe Assistant. The trick is to talk to the AI in exactly the way you would to a human, direct, clear, and descriptive.
 
To help you get started right away, here are a few simple conversational phrases you can try in your favorite apps today:
 
  • In Photoshop: “Remove the reflections from the window and warm up the lighting.”
  • In Illustrator: “Re-color this entire logo using a modern corporate blue palette.”
  • In Acrobat: “Give me a 3-bullet summary of the main action points in this document.


📥 Download Greta’s AI prompt sheet

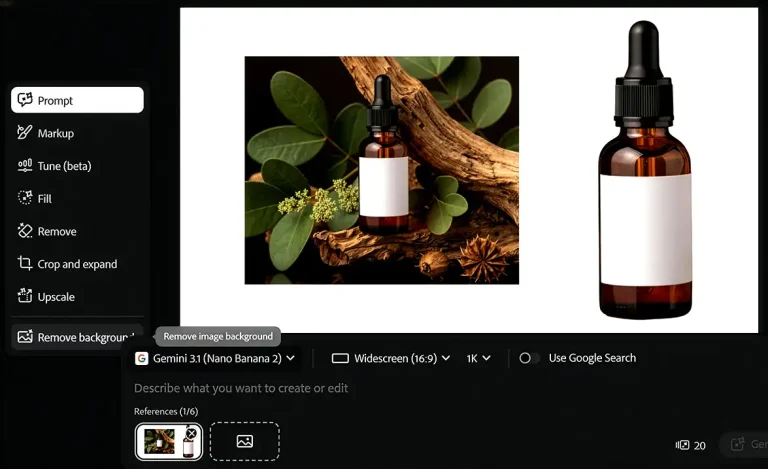
One Click Magic, remove background

The Remove Background option in AI Assist gives users a quick, reliable way to isolate a subject without needing to understand complex selection tools. With one click, Photoshop identifies the main subject, creates a clean cutout and applies a mask so the background can be refined or replaced non‑destructively.

It’s ideal for everyday tasks: product shots, staff photos, social media graphics, event images or anything where you need a simple, fast cutout. For beginners, it removes the stress of choosing the right selection method. For experienced users, it speeds up repetitive work and provides a solid starting point for more detailed refinements.

Example uses:

  • Create a clean product cutout for web or catalogue use
  • Isolate a person for posters, newsletters or charity campaigns
  • Remove distracting backgrounds from event photos
  • Prepare images for social media templates or marketing graphics
  • Build composites where you need a quick subject extraction
  • Remove Background works well because it handles the heavy lifting by identifying the subject and masking it — while still giving you full control to tidy edges, soften transitions or adjust the mask afterwards.
Removing the background in Adobe AI Assist Space
Original artwork, then background removed in preparation for product branding.

Smart Targeting: the select subject option

The Select Subject option gives users a quick, intelligent way to highlight the main person or object in a photo. With one click, Photoshop analyses the image and creates a clean selection around the subject, ready for masking, retouching, or background adjustments.
 
It’s ideal for:
  • Portraits and staff photos: Instantly highlight a team member to soften the background or adjust their lighting.
  • Product shots: Isolate merchandise quickly for e-commerce stores or print catalogs.
  • Event images: Easily separate your main subject from a busy crowd to make them pop.

For beginners, it removes the stress of choosing the right selection tool. For experienced users, it provides a fast starting point that can be refined with masks or edge adjustments.

Refining Your Images: Markup, Tune, and Fill

The Markup tool brings intuitive sketching to AI image editing. Instead of typing long, complicated descriptions, you simply draw a quick marker line or arrow directly onto your image to guide the software. For instance, you can circle an object or draw a line indicating where a shadow should go, combining natural language with a visual hint so the AI assistant knows exactly where and how to apply your changes.
 
Once you have pointed out what to change, the Tune tool gives you Lightroom-style sliders to precisely adjust the atmosphere. You don’t have to guess the right words to fix a photo; instead, you can easily alter the lighting, tweak the colors, or add a subtle glow with simple controls. This lets both beginners and experienced pros fine-tune the final look without losing that vital human control over the creative mood.
 
Finally, the Generative Fill tool takes care of the heavy lifting when it comes to adding or removing objects. By selecting an area and typing what you want in plain English, you can seamlessly blend new elements into a photo or make distracting details vanish in seconds. It completely removes the need to master complex pixel editing, saving you massive amounts of time while delivering a clean, professional finish.
 
Just keep in mind one important thing at the moment the AI cannot read raw Hex or RGB colour codes!  Instead of typing specific colour code, stick to descriptive human language like “change this box to a deep corporate navy blue” or “make it a bright sunflower yellow” to get the best results.

Greta's Pro Tip for Photographers:

💡 If you’re a fan of traditional Adobe Camera Raw filter, you are going to love this update because the Tune panel uses the same underlying lighting technology to deliver professional “Camera Raw-level results” for Exposure, Highlights, and Shadows. The brilliant part is that it outputs these adjustments directly onto a non-destructive Generative Layer right inside your main Photoshop layers panel. 

You get the power of ACR processing without ever having to jump out of your main document workflow!

A Note From Greta: keeping it human in an AI world

While I love teaching these amazing one-click AI tools on my travels across the UK, nothing will ever replace the human element of design. Whether I am heading up to York or down to London for a training week, my favorite part of the job isn’t the software, its you, the people I meet and the stories we share over a proper cup of tea. 
 
🫖 (strong, dash of milk, no sugar, if you’re asking!). AI is a fantastic assistant to handle the tedious background cleanup, but the true creative spark comes from you.
 
Don’t have a good day, have a great one!

Expand your Photoshop AI skills

If you found these artificial intelligence updates helpful, you might also want to check out my other design tutorials. For more workflow tips, take a look at an older post about Photoshop and AI to see where we’ve come in the last couple of years. Explore a bit more about What is Firefly post 
 
Of course, reading about these features is a great start, but nothing beats hands-on experience. If you or your team want to master these workflows step-by-step using your own company files, you can join me for a practical, tailored training day on my updated Adobe Photoshop AI Training Course and Adobe Firefly Course available onsite right at your office, anywhere across the UK!

Want to Read more?

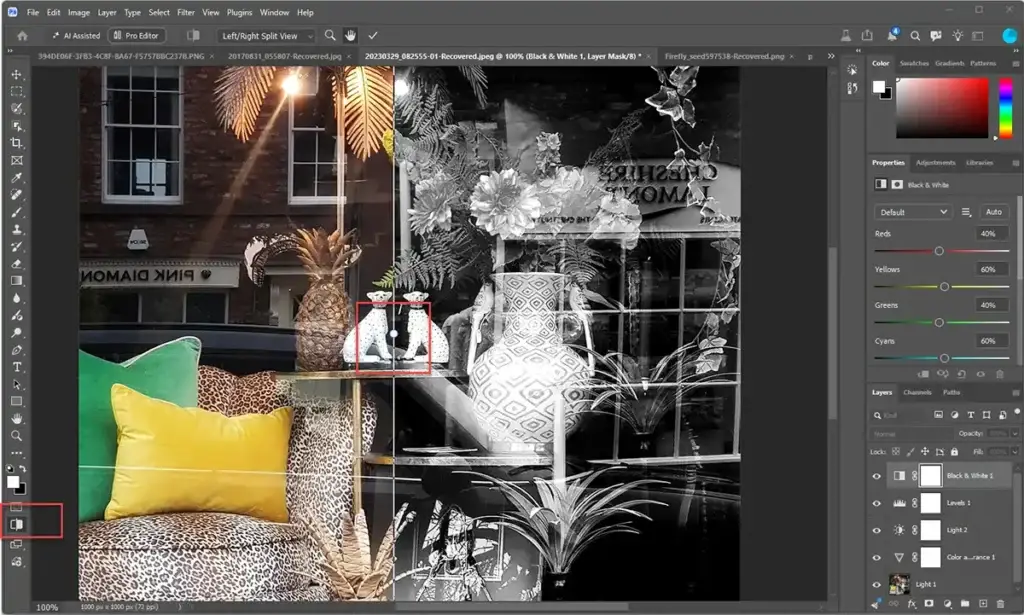
An example of light Photoshop editing on a very imperfect phone photo.

Photoshop Before & After

A real‑world Photoshop before & after using a quick phone shot from Nottingham. Learn how simple, practical edits can remove reflections, improve lighting and make everyday images clearer and more communicative.
Adobe CC and Affinity Studio 3, which to use

Switch from Adobe to Affinity

Can your company switch from Adobe to Affinity ? Switching from Adobe to Affinity? Why more organisations are questioning using